Stripping old paint can be one of the most frustrating parts of any restoration project. Traditional methods—chemical strippers, sanding, or high-heat guns—are often messy, slow, and even hazardous to your health. But there’s a smarter, safer, and faster way: infrared paint removal.
At Eco-Strip, we’ve helped contractors, woodworkers, and homeowners simplify restoration projects with the Speedheater™ infrared paint remover line. In this guide, you’ll learn the benefits of infrared technology, how to use it step by step, common mistakes to avoid, and how to dispose of old paint responsibly.
Why Choose Infrared Paint Removal?
Infrared paint removers aren’t just a modern gadget—they solve many of the problems that make traditional paint stripping difficult. Here’s what makes them a game-changer:
- No Harsh Chemicals
Skip toxic solvents and strong-smelling pastes. Infrared tools soften paint without fumes, making them safer for you and the environment. - Gentle on Surfaces
Infrared loosens paint without damaging the wood or metal beneath. That means your trim, siding, windows, or furniture keep their integrity. - Faster & More Efficient
Infrared heat penetrates multiple layers of paint in seconds, so you can scrape away decades of buildup at once. - Even, Low Heat
Unlike traditional heat guns, which at their high heat can quickly char surfaces or ignite adjacent, flammable materials, infrared bulbs heat the paint more evenly and at a lower temperature.
For projects that require precision and care—like historic window restoration with fragile glass—infrared is the safest and most effective option.
Not All Infrared Paint Removers Are Created Equal
While many brands claim to use infrared technology, quality of the product makes a huge difference.
The Eco-Strip Speedheater™ (SH) line—including the Cobra, Rapid Slim, and 1100 models—has been trusted worldwide for decades. These tools are designed to heat paint layers evenly without damaging surfaces, while cheaper alternatives often create dangerous hot spots or wear out quickly.
Here’s what to look for when choosing the right tool:
-
- Consistent Heat Distribution: Is the entire area heated evenly, or do you end up with some areas needing to be reheated? How well does it heat uneven surfaces such as curves and grooves without scorching some areas?
Speedheater’s infrared tubes heat an area fully across including irregular surfaces. - Versatility: On how many applications does it work effectively? Horizontal, vertical, overhead?
Speedheater works well on wood, metal, and stone. With or without attachments, non-horizontal and upside-down surfaces also can be heated easily. - Flexibility: How effectively does it heat paint in tight areas, such as corners and edges? Can the heat be reliably directed at different angles
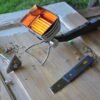
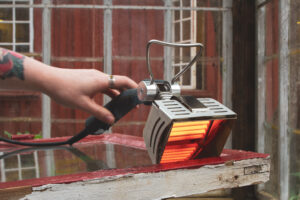
Cobra Speedheater’s small head fits easily into tight spaces like corners and across grooves and curves. The support bar makes adjustments to match the surface angles quickly. - Durability and Sustainability: How well will it hold up after months or years of regular use? Does it include a stand or handle for safely placing it between uses without risk of burns or accidental falls?
Speedheaters are proven by our customers to operate reliably for decades with proper maintenance and repair. In contrast, cheaper heat guns and infrared paint strippers are not repairable and must be disposed of and replaced when they fail. The infrared bulbs are tested to last 2,000-3,000 hours. For safe resting, the Cobra features a support bar, while the Rapid Slim and 1100 models rest securely on their handles. - Ergonomic: How comfortable is the unit to hold for extended periods?
The Rapid Slim and 1100 side plates are placed directly on the painted surface, correctly positioning the bulbs in relation to the painted surface. No need to struggle to find the proper distance from the surface. The Hands-Free attachments securely hold the tools in place while heating a surface and allow smooth movement to other areas. The Cobra’s 22 oz makes the tool comfortable for hours of continuous use. Less muscle strain. Less pain.
- Consistent Heat Distribution: Is the entire area heated evenly, or do you end up with some areas needing to be reheated? How well does it heat uneven surfaces such as curves and grooves without scorching some areas?
Safety First: Preparing for Paint Removal
Even though infrared is safer than chemicals or heat guns, basic precautions are essential:
- Wear safety goggles and heat-resistant gloves.
- Work in a well-ventilated area and use a respirator indoors.
- Keep flammable materials away from your workspace.
- Place plastic sheets beneath your project to catch and contain paint scrapings.
- Mask off surfaces where the heat should not be going. Use Speedheater Aluminum Protection Mats.
-
Common Mistakes to Avoid
Infrared tools are easy to use, but watch out for these common pitfalls that can slow your work or damage the surface:
- Holding the tool too close – Maintain the distance recommended in the manuals to avoid scorching.
- Forcing the scraper – Let the heat do the work. Scraping too aggressively can gouge wood.
- Working on unstable surfaces – Secure free-standing, horizontal objects like window sashes and doors to prevent movement during heating and scraping.
- Ignoring the manual – Each Speedheater model has different heating times. Check the manual unique to y our model for details:
-
👉 Selecting the appropriate Speedheater model and scrapers and accessories ensures cleaner, faster results.
Step-by-Step: How to Use a Speedheater™
Step 1: Prepare the Surface
-
-
- Remove knobs, hinges, or locks.
- Clean away dust and debris.
- Cover nearby areas with protective sheeting.
-
Step 2: Heat the Paint until it bubbles
-
-
- Cobra: Hold about 1 inch away for 3–7 seconds.
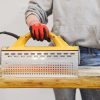
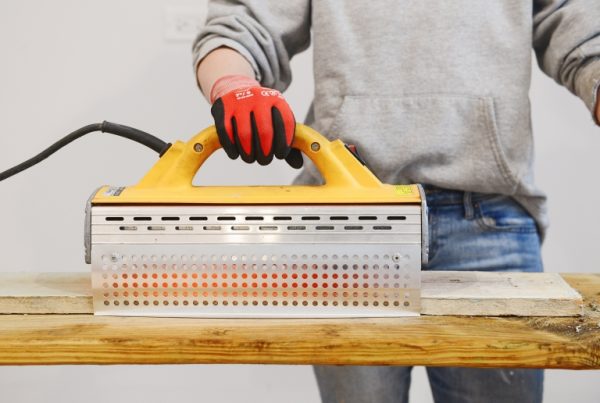
- 1100: Place the fixed, side plates directly on the surface for 20–60 seconds.
- Rapid Slim: Place the fixed, side plates directly on the surface for 10-30 seconds. For metal or extra-thick paint layers, allow more heating time.
-

Step 3: Scrape the Paint
Once paint bubbles slightly, immediately cut through all the layers of paint with the correct, pull-type scraper blade, and do long and even pulling strokes. Work in sections for consistent results.
Step 4: Repeat if Needed
If the paint is dry and brittle and does not react to the heat, it may need to have oil put back in it. Apply a 2:1 mix of linseed oil and mineral spirits, then reheat and scrape.
Step 5: Smooth the Surface
If the surface is to be stained or varnished, a totally clean surface is needed. In this case, after paint removal, lightly wet-sand or apply linseed oil, slightly heat and use steel wool to remove any residual paint. This prepares the wood or metal for refinishing. If the wood is to be repainted and it is smooth to the touch, sanding may not be necessary, and repainting can begin immediately.
Tips for Success
- Test on a hidden area before starting.
- Keep the tool moving to avoid overheating an area.
- Use the right scraper – metal blades for thick layers on wood, plastic for metal and delicate wood. Select blade edges to match the surface being stripped.
- Maintain your tool – clean the metal reflector inside the tool after each use and store it in a dry place.
- Inspect regularly – check cords and bulbs for damage to ensure safe operation.
-
Eco-Friendly Disposal of Paint Scrapings
Infrared paint removal creates less hazardous waste than chemical strippers, but proper disposal is still important:
- Collect scrapings on plastic sheeting. Roll the sheeting up carefully to contain the waste.
- Seal sheeting with chips in a heavy plastic bag, tape securely, and clearly label (LEAD PAINT SHAVINGS).
- Follow local disposal guidelines for lead-based paint.
-
Why Choose Eco-Strip Tools?
At Eco-Strip, we’re passionate about preservation not replacement of painted surfaces. Our line of Speedheater™ infrared paint removers make restoration and stripping projects safer, faster, and more sustainable. Whether you’re refinishing furniture, restoring historic windows and woodwork or stripping siding, our tools help you:
- Remove multiple layers of paint without harsh chemicals.
- Protect delicate woodwork and metal surfaces.
- Save time and effort while reducing environmental impact.
-
With the right preparation and tools, paint removal doesn’t have to be stressful. It can actually be rewarding—revealing the beauty of the materials underneath and extending the life of your historic or modern projects.
Ready to Transform Your Restoration Projects?
Upgrade your paint removal process with Eco-Strip’s full line of Speedheater™ infrared paint removers and accessories. Contact us today to learn more and find the right model for your project.