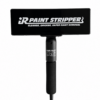
If you’ve ever struggled with stubborn layers of old paint, you know how frustrating traditional paint removal methods can be. Chemical strippers are messy. Sanding creates hazardous dust. Heat guns can easily scorch wood when used incorrectly. That’s why more professionals and DIY enthusiasts are switching to an Infrared Paint Stripper.
An IR Paint Stripper uses infrared heat to soften paint without relying on open flames or harsh chemicals. Instead of burning the paint, infrared heat penetrates through multiple layers, loosening the bond between the paint and the wood. The softened paint can then be scraped away with much less effort, leaving the original surface in excellent condition.
Whether you’re restoring historic windows, refinishing doors, or removing decades of paint from siding, here’s everything you need to know about using an infrared paint remover safely and effectively.

Infrared Paint Remover
Why Choose an Infrared Paint Stripper?
An Infrared Paint Stripper offers several advantages over conventional paint removal methods.
Unlike chemical products, there’s no messy cleanup or toxic residue. Unlike sanding, it dramatically reduces airborne lead dust. Compared to a traditional heat gun, infrared heat warms the paint more evenly, helping preserve delicate wood surfaces.
Many restoration professionals choose an IR Paint Stripper because it:
- Removes multiple layers of paint in a single heating
- Helps preserve historic woodwork
- Reduces paint dust
- Minimizes the risk of scorching wood
- Makes scraping significantly easier
- Works on windows, doors, siding, trim, furniture, and moldings
When paired with quality scrapers, an infrared paint remover becomes one of the most efficient restoration tools available.


Step 1: Prepare Your Workspace
Before using your Paint Stripper Machine, take a few minutes to prepare your work area.
If you’re working indoors, ensure adequate ventilation. Cover nearby furniture or flooring to catch paint chips, especially if you’re dealing with older coatings that may contain lead.
Wear appropriate safety equipment including:
- Safety glasses
- Heat-resistant gloves
- Long sleeves
- A respirator, if disturbing lead-based paint
Position plastic sheeting below the work area to collect the paint debris.
Keeping a clean workspace will make the project safer and much easier to manage.

Cover the ground to catch paint shavings.
Step 2: Inspect the Surface
Every project is different.
Check the wood for loose boards, protruding nails, damaged glazing, or signs of rot before beginning.
An Infrared Paint Remover works exceptionally well on:
- Wood siding
- Window sashes
- Doors
- Decorative trim
- Moldings
- Furniture
- Exterior architectural details
If you’re restoring historic windows, infrared heat is especially effective because it can also soften old glazing putty while protecting the surrounding glass from breakage.

Step 3: Heat One Small Section at a Time
This is where the magic happens.
Place the Infrared Paint Stripper over a small section of paint. Depending on the paint thickness and the model you’re using, heating typically takes anywhere from a few seconds to under a minute.
Rather than burning, the paint gently will begin to soften as the infrared heat penetrates through multiple layers.
Avoid heating an area that’s too large. Working in manageable sections gives you the best results and prevents the paint from cooling before you begin scraping.
Step 4: Scrape While the Paint Is Soft
As soon as the paint softens, remove the heat source and begin scraping.
Use a sharp pull scraper that matches the profile of the surface whenever possible. Let the scraper do the work rather than forcing it.
A properly heated surface allows the paint to lift away in thick strips instead of small flakes.
If some paint remains, simply reheat the area briefly and scrape again.
Many users are surprised by how quickly an IR Paint Stripper removes decades of accumulated paint layers with minimal effort.
Step 5: Work Methodically Across the Surface
Continue heating and scraping one section at a time.
Develop a consistent rhythm:
- Heat
- Remove the heater
- Scrape
- Repeat
This systematic approach helps maintain even progress while reducing fatigue.
For large projects such as siding, work from the top downward to prevent paint debris from falling onto freshly cleaned areas.
Step 6: Handle Detailed Areas with Precision
Detailed moldings, carved trim, window muntins, and decorative profiles require a little extra patience.
Instead of trying to heat a large area, focus on smaller sections and use profile scrapers that match the shape of the wood. If different levels of the wood are being heated at once, such as carved wood, scrape the surface farthest from the heat source first. If you scrape the higher surface first, the deeper surface may cool off and need reheating to soften it. This reheating may cause the closer now bare wood surface to scorch. An infrared paint remover excels at preserving intricate architectural details because it softens paint without aggressively grinding away the original wood.

Scrapping Detail woodwork with the Speedheater Cobra
Step 7: Final Surface Preparation
After removing the paint, inspect the surface.
Depending on how meticulously a surface must be cleared of paint, some may require light sanding before priming or refinishing. Normally, the scraping leaves a slight roughness on the wood which makes the new paint adhere better.
Because an Infrared Paint Stripper removes paint without aggressively abrading the wood, you’ll often preserve crisp edges, molding details, and original details that would otherwise be lost.
This makes infrared technology especially popular among preservation contractors and historic homeowners.
Tips for Better Results
Here are a few techniques that can make your project go even smoother.
Don’t Rush the Heating Process
If the paint doesn’t scrape easily, it probably needs a few more seconds of heat.
Trying to scrape paint before it’s fully softened only creates extra work.
Keep Scrapers Sharp
A sharp scraper dramatically improves efficiency.
Replace or sharpen scraper blades regularly throughout your project. You can use our Grinding Kit to sharpen your blades and keep them clean.
Work in Comfortable Temperatures
Infrared paint removal works year-round, but moderate outdoor temperatures often provide the most comfortable working conditions. Wood that is too cold requires longer heating time. It gets cooler faster between heatings and scraping.
Practice on a Small Area First
Every paint system behaves differently.
Testing your technique on a hidden section helps you determine the ideal heating time and pressure of scraping before moving to more visible areas.
Infrared Paint Stripper vs. Heat Gun
Many people wonder whether an Infrared Paint Stripper is better than a traditional heat gun.
The biggest difference is how the heat is delivered.
Heat guns blow extremely hot air directly onto the paint, which can easily scorch wood or vaporize old coatings if held too long.
An IR Paint Stripper delivers infrared energy that penetrates beneath the paint layers and slightly into the wood underneath. The bottom layer of paint separates from the wood and softens. Concentrated, blowing, high heat must heat the surface paint first and then penetrate down to the other layers of paint. This risks scorching the top layer. In addition, this heat penetrates deeply into the wood, harbors there and can ignite hours later, causing a fire behind what is visible. Infrared heat creates a safer, more controlled paint removal process while helping preserve valuable wood surfaces.
Is an Infrared Paint Stripper Safe for Lead Paint Removal?
Many homes built before 1978 contain lead-based paint.
While no paint removal method completely eliminates risk with lead paint, an Infrared Paint Stripper keeps paint soft and reduces airborne dust compared to aggressive sanding. Also, with infrared, the paint is required to heat to a lower temperature which is below lead’s vaporization temperature. The likelihood of releasing toxic lead fumes is dramatically reduced with the infrared process.
Always follow EPA guidelines for Lead Paint Removal, wear appropriate personal protective equipment, and properly collect and dispose of paint debris.
When used responsibly, infrared technology can be an excellent choice for restoration projects involving older homes.

Lead Safe Equipment to Strip Paint
The Best Tool for Wood Restoration
Whether you’re restoring antique furniture, historic windows, decorative trim, or entire homes, an Infrared Paint Remover provides a cleaner, more efficient alternative to traditional paint removal methods.
With patience, proper technique, and quality scrapers, your Paint Stripper Machine can remove decades of paint while preserving the character and craftsmanship of the original wood.
If you’re looking for a Wood Paint Stripper that combines efficiency, safety, and outstanding results, an Infrared Paint Stripper is one of the best investments you can make. It simplifies difficult restoration projects, reduces cleanup, and helps protect the surfaces that make older homes so beautiful.